Saturday, November 9, 2013

Chocolate Glazed Sprinkle Doughnuts


Chocolate Glazed Sprinkle Doughnuts

My husband really wanted doughnuts yesterday, but I didn't want to pay for doughnuts haha. So I told him I would make doughnuts. 

You know what he said to me?!!?

"You can't make doughnuts"

Oh really?? Challenge accepted...

Normally, I'm all for making things from scratch. But after making pizza dough yesterday, I really didn't want to make more dough, and put it in the fridge over night, then let it rise, roll the dough, cut the dough, let it rise again, then make them....

So I took the easy way out, but guess what?? They were still awesome!

I remember my mom making them when I was kid. So when I went to the store last night to get our "pre-snow" essentials, I picked up a pack of Pillsbury biscuits. They definitely have a doughnut recipe on the outside of the 4 pack...

Except, they say to bake them. Sorry I wanted fried doughnuts. So I fried them in coconut oil!

I got my chocolate icing recipe from Food Network and let the kids dip them in the glaze and sprinkles. They came out looking so skillfully decorated...

I did the one in the front..

So these were delicious, but messy. I covered the holes in cinnamon and sugar. I also have a TON  of glaze left over. And 3 packs of biscuits. So I put the glaze in the fridge and I'll make more another time!

Doughnuts

Ingredients

1 pack of biscuits
Enough oil for frying them (I used probably 2 cups of coconut oil)

Directions

Heat your oil to 375.
Flatten your biscuits to about 2.5 inches and either use a 1 inch biscuit cutter to get the middle out, or like me, who doesn't have a 1 inch cutter, use a kids medicine cup...It really worked quite well..
Then cover the doughnuts and holes with a towel while the oil heats up.

Make your chocolate glaze. (recipe below)

By now the oil should be hot enough.

Fry the holes first. I did 2 minutes a side. You want there to be enough oil that the holes are "floating in the oil."

Set aside on paper towels or a cookie rack.

Fry the doughnuts for 2 minutes a side as well.

Let them cool enough for you to handle them well. 

Roll the doughnut holes in cinnamon and sugar.

Dip the doughnuts in the glaze and set on rack to drip excess glaze off. Let them sit for a few minutes and dip once more. Then put sprinkles on a plate and dip the doughnuts in the sprinkles and let sit for a few more minutes. The glaze recipe says 30 minutes, they lasted 10 before everyone wanted one. But we still have 5 more that have been sitting for a while and the glaze is plenty dry. 

Then enjoy!


Ingredients

1/2 cup unsalted butter
1/4 cup whole milk, warmed (I used almond milk)
1 tablespoon light corn syrup ( I just put 1 tablespoon of water)
2 teaspoons vanilla extract
4 ounces bittersweet chocolate, chopped (I used 4 oz of mini chocolate chips)
2 cups confectioners' sugar, sifted

Directions

Combine butter, milk, corn syrup, and vanilla in medium saucepan and heat over medium heat until butter is melted. Decrease the heat to low, add the chocolate, and whisk until melted. Turn off heat, add the powdered sugar, and whisk until smooth. Place the mixture over a bowl of warm water and dip the doughnuts immediately. Allow glaze to set for 30 minutes before serving.

Tuesday, November 5, 2013

Homemade Hot Chocolate


Well we finally have snow coming down in Alaska!  It's been going all day long. We had to walk my daughter to school, like we do everyday. She has to wear her full snow gear to school so they can play at recess. So I usually put my son's snowsuit on him too because he likes to dress like her! So we suited up and walked in the snow.  They had a blast! Pretending to throw snowballs (it's too powdery) and making snow angels along the way. 

 When we got back home, I decided that the sidewalk, driveway, and porch needed a mid day sweep. So I let my son play around while I swept the snow away. By the time we came back inside, his face was red and we were cold!!

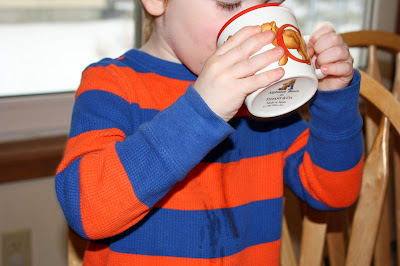
I stopped buying premixed hot chocolate because I have been making it with cocoa powder. But today, I decide to shave some semisweet chocolate and mix it with some milk! It was delicious, but messy!


Homemade Hot Chocolate

Ingredients 2 servings (for kids 1 for adults!)

1 oz semisweet chocolate, shaved or finely chopped
1 cup of milk
Whipped cream

Directions

Divide the chocolate between 2 mugs leaving a little out for sprinkling later. Heat the milk in a saucepan on medium heat, stirring constantly. When the milk begins to foam, remove from heat and pour into mugs. Stir until melted. Top with some whipped cream and the rest of the chocolate shavings. Enjoy!


Thursday, October 31, 2013

Pulled Pork Barbecue


Happy Halloween!  It's snowing here in Alaska, so now we really do get to wear our snowsuits under our costumes! I'm really glad I have dinner already done so it will be a no fuss night!

I put the pork butt in the crock pot around 7 am and it is usually done around 4-5pm depending on the size.

I love my crock pot.

Seriously..

I use it almost daily.

When we first got here, my crock pot was broken after the first use. I wanted to cry! We got it as a wedding present and it was huge and well loved. Unfortunately, I couldn't order a replacement crock for it. I tried, but they didn't have them anymore. So I held off buying a new one, because I wanted to research and get a fancy one that could be used on the stove top as well!

Well 3 months later I still didn't have one. And I missed my easy dinners. I had to make my barbecue in the oven instead. It was touch and go with that.

The first time I cooked the pork in the oven, it was done by 10 am....

So we had barbecue for lunch! Then next time, it got too dry (I may or may not have checked on it...).   By the 3rd time I cooked it in the oven, I had it down.

But I really needed a new crock pot. I was not happy having to make my chicken broth on the stove. My stove top cooks really hot and it's hard to get it to the right temperature to where I can just leave it. So I went out and bought a cheap $20 crock pot and it has been working fine.

Yeah I miss my big one, I can't cook as big of pork butts as I used to. It takes longer to cook than my older one did, but I can still just put something in there and walk away and not have to worry about the liquid boiling out when it was supposed to be simmering...And I can put my pork in there in the morning, and know it'll be good until dinner time.


Pulled Pork Barbecue


Ingredients

Small pork butt *
2-4 Tbsp of your favorite dry pork rub**

Directions

Pat your meat dry with paper towels. Sprinkle over meat and rub it in really well. I usually wrap mine up in plastic wrap and put it in the fridge for an hour if I'm preparing the day of cooking. 

Place in the crock pot with the fat side down. Turn on low for 7-8 hours or until meat pulls apart very easily. I usually drain the liquid about halfway through so it keeps the outside a little dry ( I love the burnt ends!).

Once the pork is done, I usually shred mine in my kitchen aid mixer with the paddle attachment. Then I add barbecue sauce and stir it together and serve.

*I buy my pork butts at Sam's club. They are huge and I cut them in half. So the weight is different every time. I put the rub on, wrap in plastic wrap, and freeze until I want to use them. I put them in the fridge 2-3 days before I want to cook them to let them thaw.

**Dry Pork Rub

Ingredients

1/2 cup brown sugar
1/4 cup paprika
1 tbsp black pepper
1 tbsp salt
1 tbsp chili powder
1 tbsp garlic powder
1 tbsp onion powder

Directions

Put all ingredients together in a jar. Seal and shake to mix them together. Store them in the sealed jar.

Wednesday, October 30, 2013

Crazy Life

Well I don't have a recipe for you today. It's been a crazy week!! And we still have Halloween tomorrow night. My daughter has been home since last Friday due to the weekend and parent teacher conferences. So today I'm cleaning. I will definitely have a post tomorrow because I'm making pulled pork! I already have it planned so I can take pictures while getting it ready, rather than scrambling at the last minute only to end up eating pancakes or peanut butter and jellies!

If you haven't gathered from my previous posts, we currently live in Alaska! It's our first winter here, and I'm dying to see the snow!! Normally there is at least 1-2 feet of snow by now and the temperatures are steadily in the 0's.

Not this year.

It got up to 56 on Monday! And we still have no snow. If it doesn't snow by tomorrow night, it will be the first time since 1938!

I had to go buy candy yesterday. I really wasn't expecting trick or treaters on Halloween if it was going to be zero with snow everywhere. Now I just hope I have enough candy!

My husband and I are those lame parents that don't dress up. I really just don't have any desire to do so. My kids don't care if I do, so it's okay. I have a few times. But it's just a basic witch costume. And since I thought it was going to be freezing cold, I didn't want to have to plan a costume that would fit over a snow suit for myself. The kids will be Thomas the Train, and a Cowgirl riding a unicorn. I got their costumes at once upon a child for $5 total. Awesome deal! They are excited, and I won't be upset when they use them as dress up after Halloween and rip them within 1 week.

So tomorrow, look forward to my awesome and easy pulled pork BBQ recipe!

Saturday, October 26, 2013

Lasagna


My camera and I didn't cooperate today. I had my husband take pictures of me assembling this and none of the pictures were focused. I had to take what I could get, so I'm sorry they aren't the best. We also went to a local trick or treat event, and all of the pictures came out entirely too bright. I would like to say it was my husband's fault, since he took most of the pictures, but the ones I took of the kids didn't come out as well. It was hectic and busy and I didn't pay attention to the settings of the camera. Oops. Good thing we have the real Halloween coming up next week!

The hardest part about this blog for me, the recipes that are mine, are never really recipes. I never make them the same way twice. So this is my way of making a recipe and recording it! I play around with them all the time and make substitutes when needed.

Today I had everything ready to go, vegetables sauteed, noodles cooked and turkey browned..Then I realized I forgot to get ricotta cheese yesterday. The store here doesn't open until 10 am. So I had to wait to go and get it. Once I got the ricotta, I assembled it to be baked later. If I had cottage cheese, I would have substituted that!

I put it all together, popped it in the fridge, and had dinner finished by 11 am! Then we went about our festivities for the day. Trick or treating, fall festival at the school, and some cleaning. I'm totally taking tomorrow to relax. I've been running ragged all week and need a break!


First collect all of your ingredients and prep/cook them.


Put some sauce on the bottom of the pan.


Spread some ground turkey/beef(whatever you want to use!), onions, spinach, and mushrooms. Sprinkle with cheese and spread a layer of sauce.


Cover with more noodles, and spread ricotta mixture on top. Continue layers of meat mixture then ricotta mixture until all used up.


When you get to the final layer, top with sauce and cheese.


Bake at 350 for 30 minutes covered. Remove cover and bake for another 30 minutes. If your cheese isn't browned enough on top, turn the broiler on for 2-3 minutes (keep an eye on it to keep from burning!)

Lasagna


Ingredients

1 lb of ground meat
1 small onion, diced
10 oz of spinach, frozen or fresh sauteed (chopped)
1 cup of diced mushrooms
4 cups of marinara sauce
2 cups of mozzarella
15 oz of ricotta cheese
1 egg
1 tsp of salt
3-4 tbsp of chopped parsley
1 box of lasagna noodles
Butter/cooking oil

Directions

Fill a large pot with water and bring to a boil. Meanwhile, saute the onions until soft and translucent. Remove from pan, add mushrooms and saute until browned. Remove from heat and saute the spinach of you need to. Brown meat in the pan and drain. Once everything is cooked set aside and add lasagna to pot with a pinch of salt. Boil according to instructions. Rinse with cold water and lay flat on paper towels.

Whisk the egg in a bowl. Add 1 tsp of salt, parsley and ricotta cheese. Mix well.

Begin to assemble the lasagna. First put a thin layer of sauce, followed by noodles. Sprinkle meat, onions, mushrooms, spinach and cheese. Cover in sauce. Add another layer of noodles. Spread 1/3-/12 of the ricotta mixture (depending on how many layers you want). Cover with noodles and continue to layer until ingredients are gone. On the last layer, add sauce and cover with cheese.

Bake immediately, or store in the fridge for 2 days and then bake.

Bake at 350 for 30 minutes, covered. Remove cover and bake additional 30 minutes. If the cheese isn't browned enough, broil for 2-3 minutes. (Keep an eye on it so it doesn't burn!)

Thursday, October 24, 2013

Buttermilk Biscuits


 Sorry I haven't posted in a few days. I had to cook dinner for bible study, then cleaning the house, and then the night I had planned to write a post, my husband got me a book, that I read from 6pm-1am off and on until the kids went to bed. Now I'm super tired, but I had to finish the book! It was really good :) So I'm taking some time to post this before I get distracted with the next book, or maybe doing my bible study homework...I really need to make a daily schedule or something.

Anyways, homemade biscuits are the best! I used the buttermilk from the butter I made last week. I just froze it in a baggy. I always freeze after the first day if I don't use it. Simply because I'll forget about it, then it goes bad and it's much easier to just freeze and thaw when I need it!


Normally I like to make my own recipes and tweak and tweak until I get it just right. But this one has always worked out for me just fine. If it aint' broke, don't fix it!!


Combine your dry ingredients.


Add the chopped butter.


Mix until it's crumbly. I used a dough blender, a fork would work as well.


Make a well for the buttermilk.


Stir until dough just comes together.


Turn out onto a floured surface and fold the dough over a couple of times. Flatten until the dough is about 1 inch thick. Then take your biscuit cutter and make as many as you can. Then reform the dough and continue making biscuits until the dough is all gone.


Place on a greased cookie sheet, or parchment paper and bake at 450 for 15-20 minutes.


Buttermilk Biscuits

from Alton Brown's Southern Biscuits


Ingredients


2 cups flour (I used bread flour)

4 teaspoons baking powder
1/4 teaspoon baking soda
3/4 teaspoon salt
2 tablespoons butter (I used all butter, I never have shortening..)
2 tablespoons shortening
1 cup buttermilk, chilled


Directions


Preheat oven to 450 degrees.

In a large mixing bowl, combine flour, baking powder, baking soda and salt. Using your fingertips, rub butter and shortening into dry ingredients until mixture looks like crumbs. (The faster the better, you don't want the fats to melt.) Make a well in the center and pour in the chilled buttermilk. Stir just until the dough comes together. The dough will be very sticky.

Turn dough onto floured surface, dust top with flour and gently fold dough over on itself 5 or 6 times. Press into a 1-inch thick round. Cut out biscuits with a 2-inch cutter, being sure to push straight down through the dough. Place biscuits on baking sheet so that they just touch. Reform scrap dough, working it as little as possible and continue cutting. (Biscuits from the second pass will not be quite as light as those from the first, but hey, that's life.)

Bake until biscuits are tall and light gold on top, 15 to 20 minutes.

**I just ordered some biscuit cutters online!! But for now I only have my daughters cookie cutters...So they are super small! But it worked out really well my kids! It made bite size biscuits.

Sunday, October 20, 2013

How to trim, cook and eat an Artichoke


Do you ever have weekends where you feel like you didn't get any down time!?! That's how I felt this weekend. We also lost a day since my husband had a 24 duty starting at 9 am on Sunday. It's 9 pm here and I am just now sitting down to write this blog that I was supposed to do yesterday. And I really trimmed and cooked this artichoke on Friday night!!

Friday nights here are pizza night. We used to order out a lot more in Kansas because we could get pretty good deals and not have to pay more than $20 for enough pizza for at least 2 or 3 meals. But now that we are in Alaska, we are lucky if we can spend less than $40 for the same amount we got in Kansas. So I have started making it instead. I used to make it in Kansas too, but not EVERY week. It was so much easier to order!

But now that we make it again, I can get creative with my toppings. My family is boring. My husband only likes a combination of either cheese, mushrooms, bacon or pepperoni. My daughter only likes bacon and mushrooms. And my son usually takes all the toppings off and just eats it plain cheese. I like to change it up and will eat any topping except pineapple or anchovies.

Since I still had artichokes left to cook, I decided I wanted spinach, chicken, tomatoes, and artichokes on my pizza! So I steamed up the last 2 artichokes to get their yummy hearts.  I used to never trim them, except to shorten the stem (it gets really stringy when cooked). But I would always get poked by the spiky leaves whenever I would eat them. So now I just take the time to slice the top and trim each leaf. Only adds a couple of minutes to prep and I don't get poked anymore!

A bonus to me cooking these artichokes, was that later in the weekend, I used the leaves as "chips" in a queso dip I made my husband! I was really impressed with how well that worked. I tried to roast them to get them crispy, but it was taking too long. So I just pulled them out and ate them as is. I may have to try that again when I'm not staring at the oven willing them to cook faster.


Anyways, here is how I prep, cook, and eat an artichoke!


First rinse the artichoke in the sink. I run the water right on it, so it goes between the leaves. If they look kind of dirty, I'll even soak it in the sink for a few minutes then rinse it one more time. Pat it dry as best you can. Holding the stem and heart firmly, slice about 1/2-1 inch off the top. You want to be able to see the tips of the purple leaves in the center. Sometimes I have to slice twice if I don't get deep enough.


Slice about 1-2 inches off of the stem and pull any leaves off that are attached to the stem and not the heart.  Then take some scissors and cut the tops off of the rest of the leaves.

Now you are ready to steam the artichokes. I steam them in a large pot with a few inches of water in the bottom. Place them in the pot and bring to a boil. Once boiling reduce to a simmer, cover, and cook for about 20 minutes.  


When they are done, the leaves should pull off very easily. You should be able to bite down near the top of the leaf and slide the "meaty" part off between your teeth. Normally, this when you sit down with my Creamy Parmesan Sauce and eat all the leaves. But I just made these for the hearts, I ripped all the leaves off and saved them for later! 


Stop taking eating the leaves when you get to the really thin ones. Well I still eat them, but you can really only bit the bottom half because the tops of those still have spikes. But you should really stop eating when you see these purple leaves. Just grab them with you fingers and rip them off until you see the choke pictured below.


 You want to slide a knife under the choke and start slicing around the heart. Once you have gone all the way around, it should just slide right out.


Here is the best part of the artichoke!